
Installation
Prerequisites
Section titled “Prerequisites”- macOS or Linux machine
- Claude Desktop client installed on your machine
- Your Blotout Cloud environment must be onboarded
Claude Desktop Configuration
Section titled “Claude Desktop Configuration”Add the following to your claude_desktop_config.json:
macOS path: ~/Library/Application Support/Claude/claude_desktop_config.json
{ "mcpServers": { "blotout-athena-api-mcp-service-remote-mcp": { "command": "npx", "args": ["mcp-remote", "https://<host-name>/stream"], "name": "blotout-athena-api-mcp-service-remote-mcp" } }}Replace <host-name> with your Blotout Cloud MCP server hostname.
Restart Claude Desktop
Section titled “Restart Claude Desktop”After making configuration changes:
- Quit Claude Desktop completely
- Restart it:
Terminal window open -a "Claude"
Verify the Server
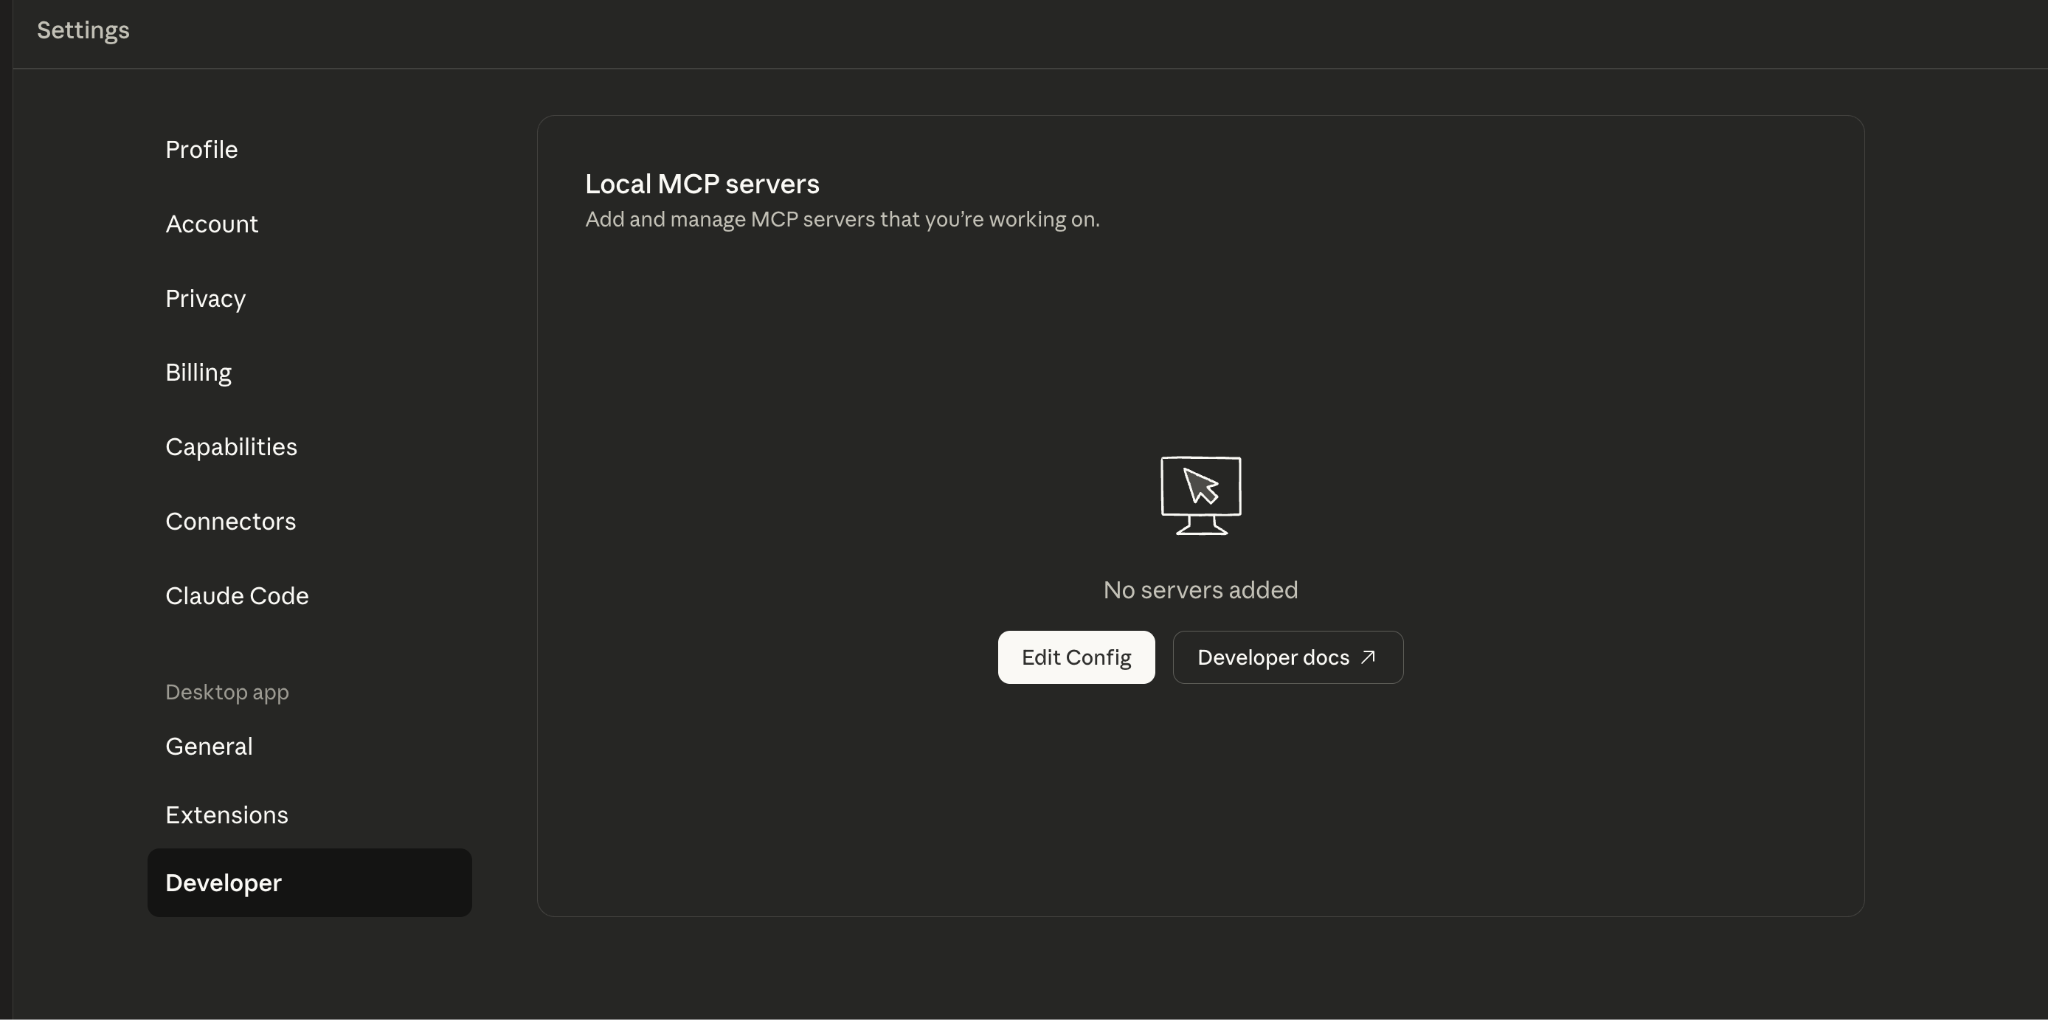
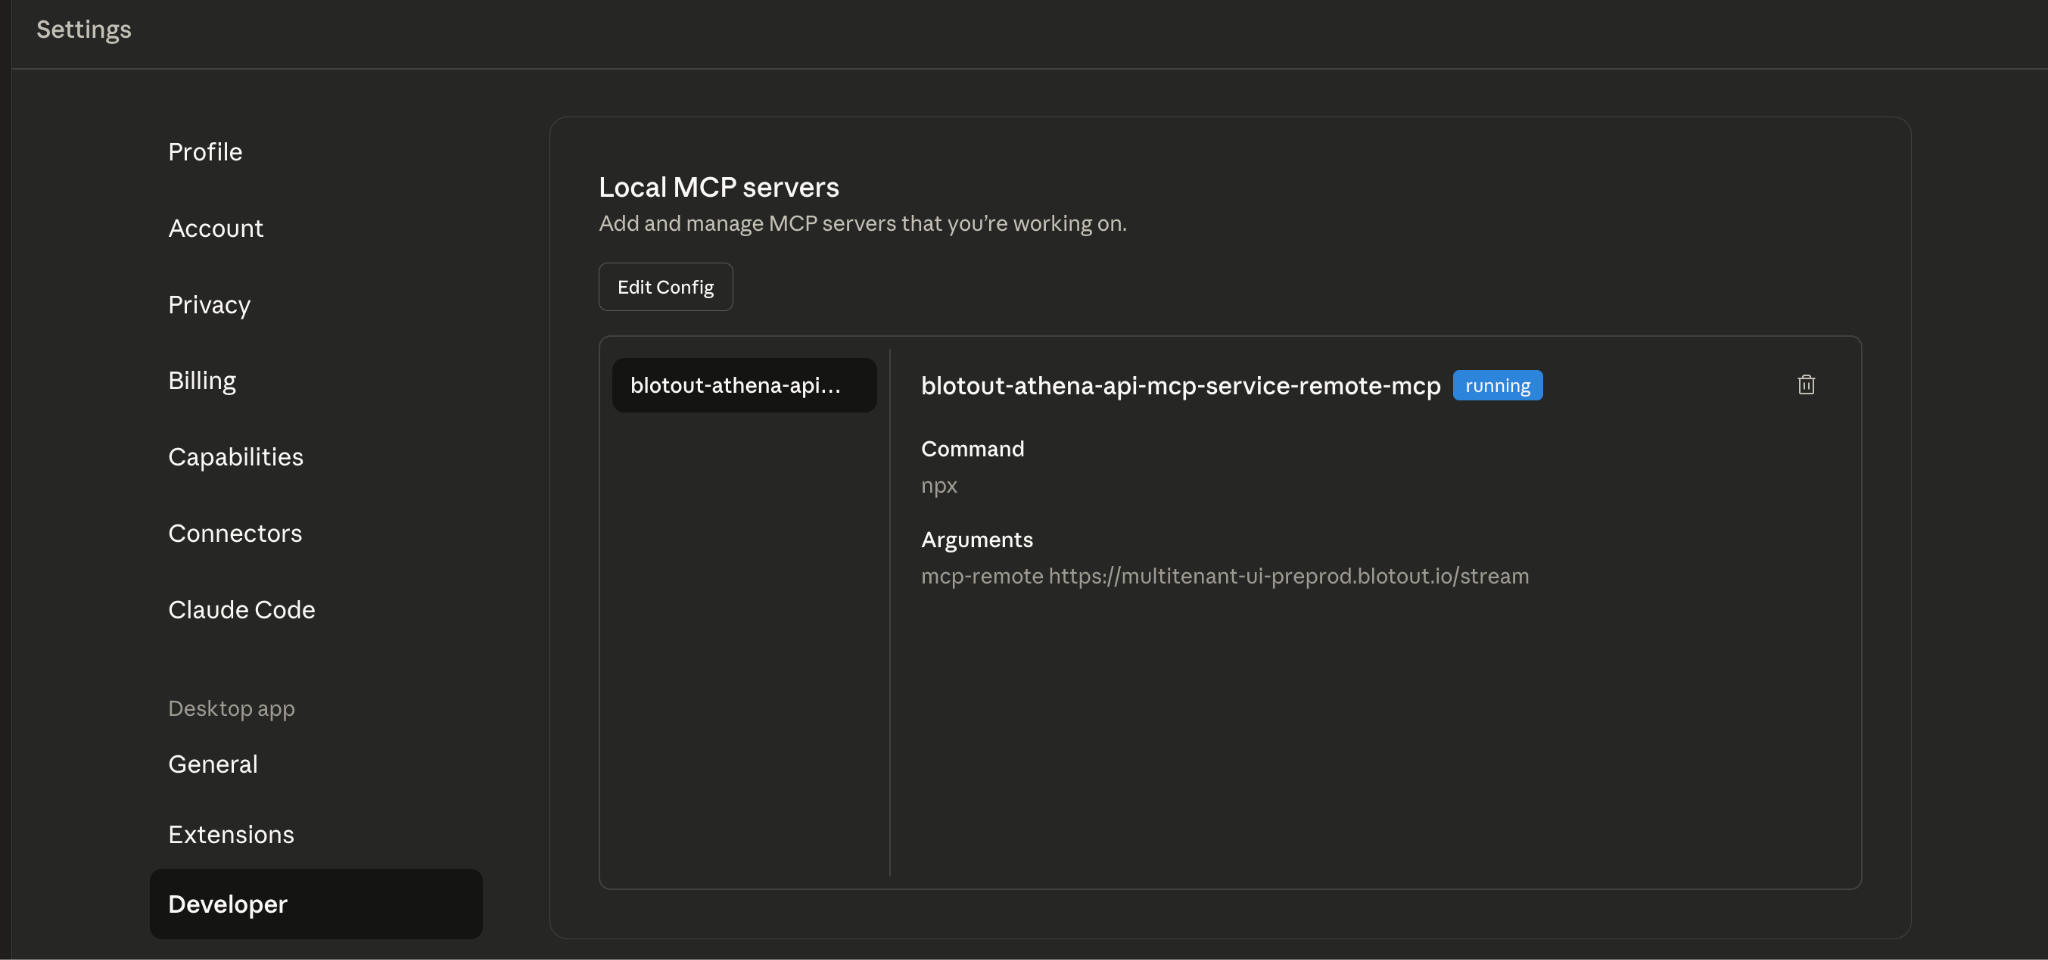
Section titled “Verify the Server”Open Claude Desktop and navigate to Settings → Developer to verify the MCP server is configured.
Before configuration — the Developer settings will show “No servers added”:
After configuration — the server should appear with a “running” status:
Enable the MCP Server
Section titled “Enable the MCP Server”In the Claude Desktop chat interface, click the settings icon next to the message input and toggle on the blotout-athena-api-mcp-ser... connector:
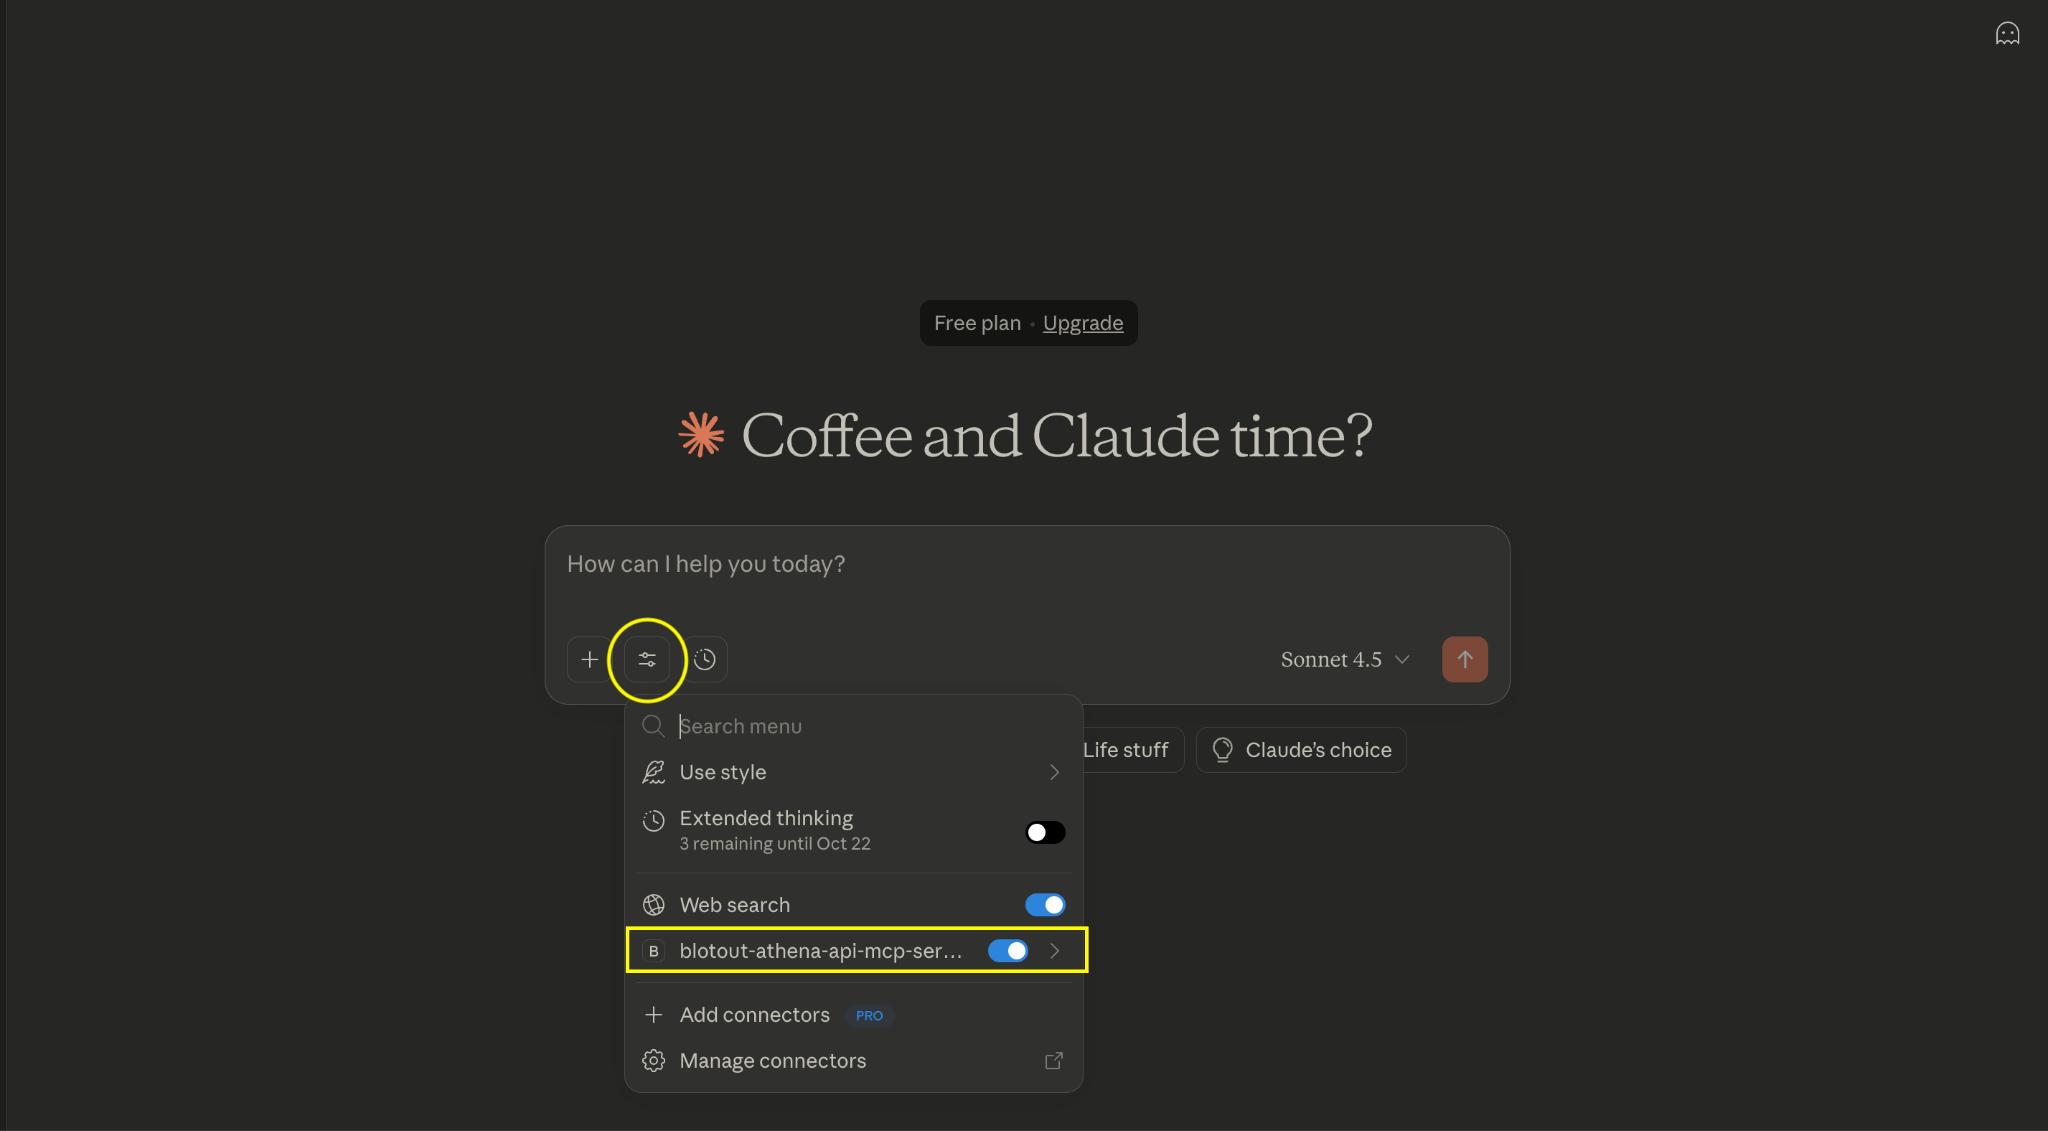
You can now start querying your data lake using natural language prompts. Before your first query, complete the Login steps to authenticate with Blotout Cloud.
Troubleshooting
Section titled “Troubleshooting”If there are errors, check the logs at:
~/Library/Logs/Claude/blotout-athena-api-mcp-service.logStep 1: Download the Installer
Section titled “Step 1: Download the Installer”Or download via terminal:
curl -O https://cloud-docs.blotout.io/mcp-installer.shStep 2: Run the Installer
Section titled “Step 2: Run the Installer”chmod +x mcp-installer.sh
./mcp-installer.sh "https://<your-org>-ui-<env>.blotout.io/stream"Replace the URL with your MCP server endpoint. For example:
./mcp-installer.sh "https://multitenant-ui-preprod.blotout.io/stream"The installer automatically:
- Installs Homebrew (if not present)
- Installs Node.js, npm, and jq
- Installs the
mcp-remotepackage globally - Configures Claude Desktop by updating
claude_desktop_config.json - Creates a backup of any existing Claude config
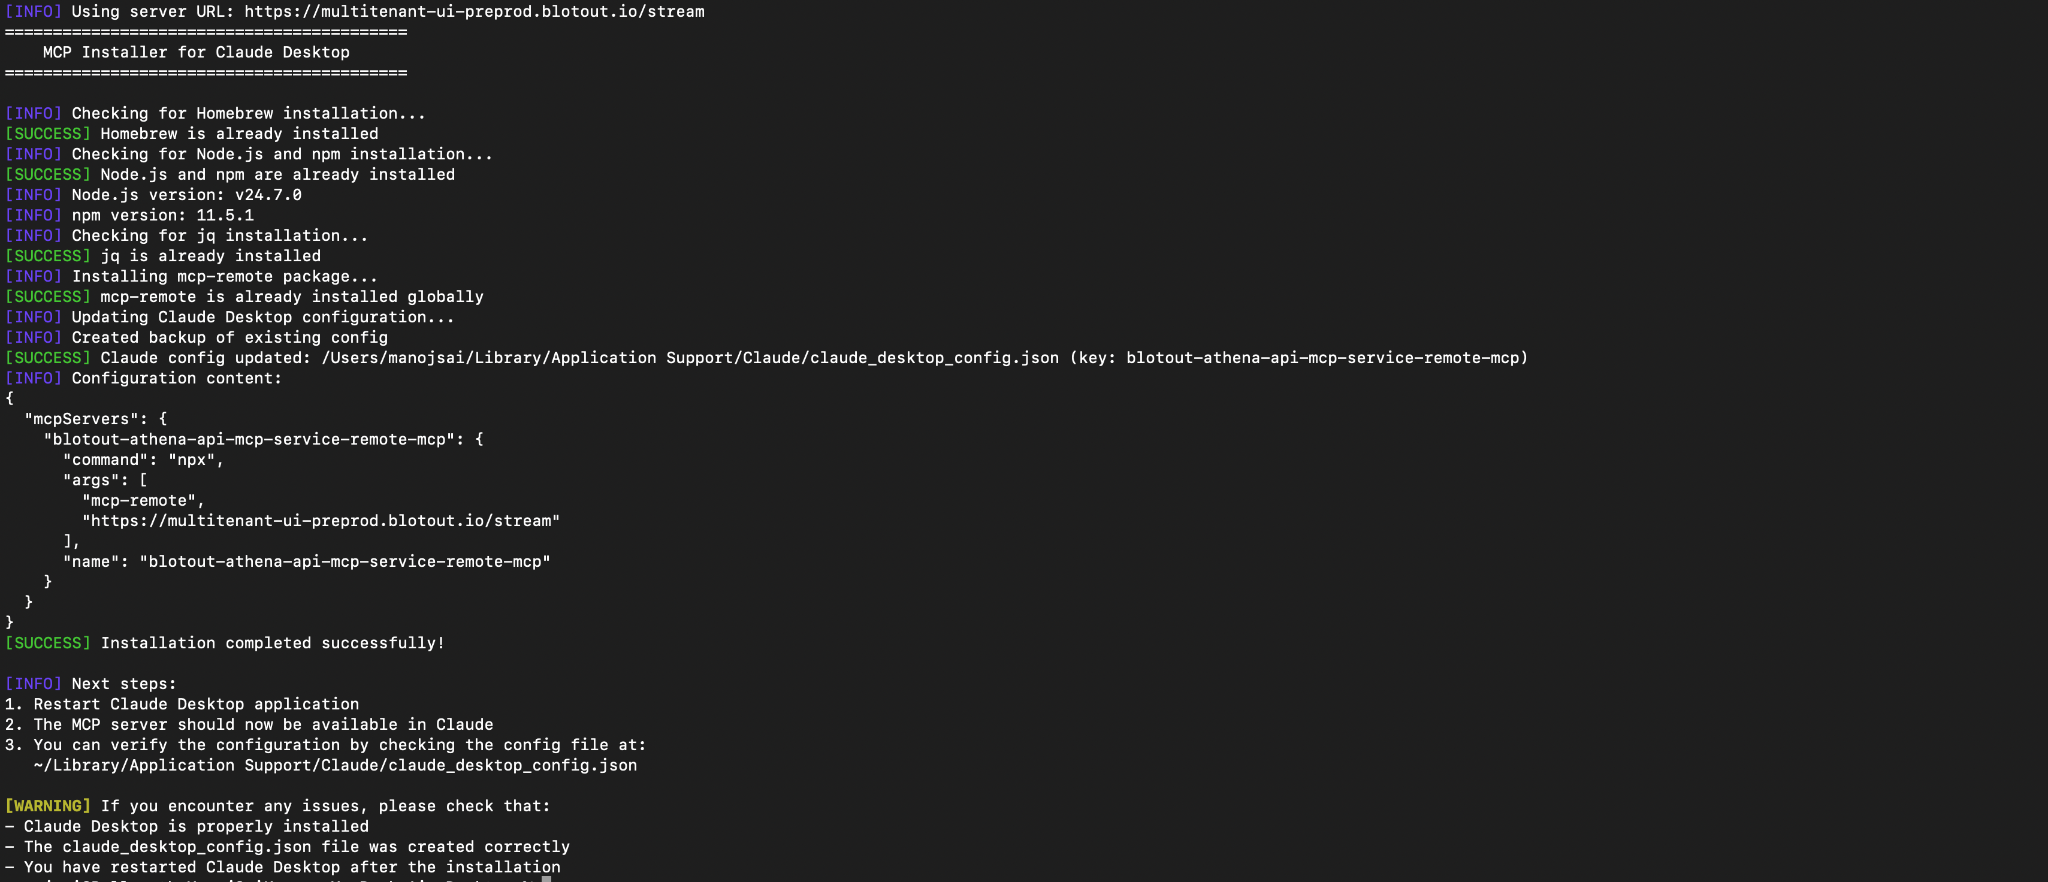
Once complete, you should see the installation output confirming success:
Step 3: Verify the Server
Section titled “Step 3: Verify the Server”Open Claude Desktop and navigate to Settings → Developer to verify the MCP server is configured.
Before running the installer — the Developer settings will show “No servers added”:
After running the installer — the server should appear with a “running” status:
Step 4: Enable the MCP Server
Section titled “Step 4: Enable the MCP Server”In the Claude Desktop chat interface, click the settings icon next to the message input and toggle on the blotout-athena-api-mcp-ser... connector:
You can now start querying your data lake using natural language prompts. Before your first query, complete the Login steps to authenticate with Blotout Cloud.